Saturday, September 13, 2014

How do you Calendar?


This post was also published at Inspired In Style...


 I guess I can be considered a veteran teacher at this point in my career—16 years—however, I don’t really like that word. It sounds like I’ve been through combat, when in reality I love what I do.  Yes, some years have been harder than others, difficult students, changing standards, but that comes with the territory right?  I’ve learned that education never stays the same, so you might as well just roll with it. Over the years, I’ve taught many grade levels and just like wine, I know I’ve improved with age. Like many of you, I take what works, and what doesn’t – I revamp, reuse and refine my plans and classroom each year to make them the best they can be.
I’m going to be completely honest with you. My Calendar Bulletin Board has always been my bane, my weakness—
bane (noun): the bane of somebody’s existence or life. Somebody or something that is a constant source of trouble or annoyance.
—When I first began teaching I didn’t look at the calendar as a tool for learning. It was there to tell the date.  What day is it?  Oh yeah, it’s Monday—again!
As I changed grade levels, schools and states, the calendar became a more integral part of my math curriculum. So, for me, looking at the dark green pocket chart with the same boring red and blue number cards was torture. Every year I would tell my class to remind me to do our calendar because I never do it out of habit or routine or free will. There was no way for my students to come up and be involved. Don’t get me wrong, the pocket chart calendar is great for some—but for me……like I said BANE!  I tried snazzing it up with a Charlie Brown and Snoopy I had made years ago, but that only helped a little.
Fortunately, (for me and my students) I found a calendar and add-on pieces to make it work for me in my weakness.


This calendar has transformed my teaching weakness. I actually ENJOY standing to the side of the calendar and watching as my Student of the Day writes in the date and tally marks. We count, we add, we learn the days of the week.  Most importantly we have fun!!!  The months of the year, days of the week, calendar # cards and weather were all a part of the Dots on Turquoise calendar Set.
I laminated the Chevron cutouts, and paisley poster, so my students can write directly on them daily.  What’s nice about using the blank cut-outs and posters is that I can change the content as I change topics and chapters in math.  All of the borders coordinate great with the calendar as well.  I used the chevron and paisley across the top of the space to make it look like water for the handmade boat holding Charlie Brown and Snoopy. The borders define the space as my calendar wall. It also coordinates with the adjacent wall, which houses my word wall—with coordinating borders. The 100 chart came from an old math series, and is actually out of date—it should be a 120 chart—but I don’t have 1 big enough right now.


We are going strong with our calendar!!!  Yay!!  Too keep it interesting, I’ve changed out the number cards with a Fall set for the next month.  My class was so excited to see the new numbers. They came in the room and were all standing in front of the calendar oohing and aahing! The color really pops on these Fall numbers and truly reminds me of the colors of fall.
To make it functional on a day to day basis all the poster pieces were stapled to the wall. I use the blue sticky tack for the moveable pieces, ie; Number cards, weather cards and days of the week cards. I like to make my calendar grow throughout the month, so my students can identify the date. They can easily add the next number on the calendar, without worrying about staples. Each day I choose a “Student of the day” as evident above on the Chevron Cut-out. That student gets to then Write the date on the laminated poster, lead the class in counting, stating the date, month and year, completing the tally chart, weather-person, leading the class in the days of the week and / or whatever other task that needs to be completed for the calendar that day.


I am thrilled to report, that the calendar portion of my day is no longer my bane. I am excited to use it on a daily basis, and my students are eager to learn. I have learned that sometimes our greatest weakness just needs a little tender love and care, as mine did. The thing that I like best, is that I can keep it interesting by changing the number cards and make it meet my needs as we change topics throughout the school year.
I hope you can make your calendar board as fun and functional in your own classroom!
Enjoy,


The Following items were used to create this space:


Wednesday, September 3, 2014

A great pair of books

Here's 2 great books for the beginning of the year that make a great Text to Text connection.

  Product Details 
by Kevin Henkes 
and 
Product Details
by Carol McCloud

First we read Chrysanthemum and made these little cuties:
What do you need?  1 large white heart. 2 small pink hears for the ears. Construction paper for the background. Black crayon or pencil. Small, pink circles for the nose. Optional-Pink construction paper for the bow--or just draw it on.
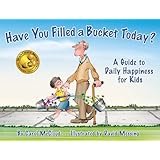
Afterwards I read them Have You Filled a Bucket Today.
We talked about which characters in Chrysanthemum were being bucket dippers and how it made Chrysanthemum feel. It was a great way to make text-to-text connections as well as talk about the way we treat others, without any tattling.

If you haven't already read these 2 books, I highly suggest putting them together.

What other books make a great pair?

Monday, September 1, 2014

Take a peek inside my classroom

The back to school rush, is finally slowing down. It's Labor Day weekend and I finally have a free moment to download some of the pictures of my classroom. The last 3 weeks have been a whirlwind!   Pre-school week consisted of meetings upon meetings upon trainings, getting my room to be presentable again after summer school and open house. School actually started 2 weeks ago; and it's been plan, plan, plan, train, train and train some more in my first grade classroom. How do you sit in your seat? How do we sit on the rug? How do you get a pencil? etc., etc., etc..... After school is a different story, it's homework (with my 3rd and 5th grader), dinner and dance (for my daughter)...soon soccer will start for my son and then every evening will be full! So here is what's been going on over the last month... in pictures and music:0)
I've embedded a little piano and cello version of The story of my Life for you to listen while you look :0)
(I'm so sorry about the sideways pictures--I rotated all of the pictures, but they still seem to upload sideways, argh!  If you happen to know a fix to this little problem, please let me know!)


This is how I begin. I used the graph paper in my Erin Condren Lesson Plan book to create 2 possible floor plans. I ended up going with the floor to the right #1.


I began planning my first week, I love the colored days in the EC Lesson planner. I am a visual person, so the little hint of color is just the perfect way for me to go through my day.


I used some Scotch Expressions Tape to mark the teacher workdays and holidays in my plan book.


Every EC Life planner and Lesson Plan book comes with stickers. I decided to write out my subjects and use those as my headers in my plan book.


My new school bag--truthfully I love the look of it, but it's already ripped inside :0( There is an inner zipper compartment, where the lining has ripped from the zipper--I don't think this tote was meant for files and plan books--but so far, I'm still using it.


I purchased this Ultimate writing station from Mel. D. at Seusstastic! The cover page is form my Editable school binders.


My new theme is birdies! These are the Tweeting birds from Creative Teaching Press.

I saw on a buzzfeed that you can dye clothes pins with Easter egg dye. Well I tried it and you can!  You have to leave it sit for a good long time if you want the color to be nice and bright. I had to flip mine over, because my glasses were shorter than my clothes pins. But they cam out nice!


This was my gift for my team!


I had the students sign their names at Open House, during the little room scavenger hunt.

This was our first grade bulletin board out in the hallway. We don't have a typical hallway with a bulletin board for each teacher, so we share this bulletin board as a team. I mustache you to find your teacher! is from Creative Teaching Press.

So the balloons look good in this picture, we got a helium tank from our local party store and did them ourselves.  We had a note hanging on the balloon, to pop it the next day so a little note would come out.  However, our helium did not last sadly. Most of the balloons were hitting the desks, by the time the kids came to meet us. Next year, I will be getting them blown up at the store and spending a few extra dollars.


My Word wall and meeting area!  Find the Chevron Chic Alphabet and Word Wall HERE.
Find the coordinating Blends and Digraphs unit HERE.


My cute little birds on a wire to hold student work. I used my dyed clothes pins on the yarn. Now I can avoid a million holes from staples in my bulletin board paper! Thank you for the birdies and border Creative Teaching press.


Again sorry for the sideways picture. but here is my little book nook. I purchased the rug from Wal-mart, and the baskets are from Really Good Stuff.
I found these coordinating poufs on clearance at Target! Can you tell I love turquoise?

Thanks for taking a peek in side my classroom. Have a great school year!


Related Posts Plugin for WordPress, Blogger...

AdSense